DIY Seiko 7S26 · Chapter 6 of 14
Chapter 6
Master Watchmaker, Clockmaker and Jeweller (since 1981)

nick@clockmaker.com.au
Suite 403, Level 4, Culwulla Chambers
67 Castlereagh St. Sydney 2000 NSW Australia
Phone: (02) 9232 0500 Fax: 02 9233 2273
 Do It Yourself Project: Seiko 7S26 for Novice Horologists
| Chapter 6: Disassembly - case / bracelet / movement extraction
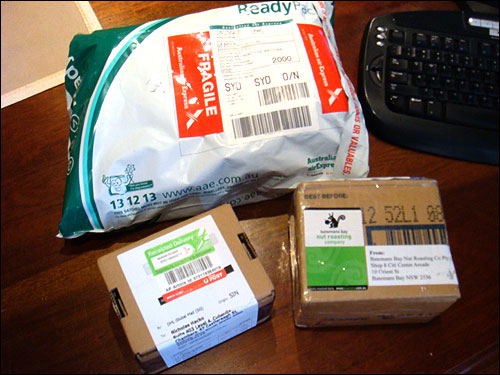
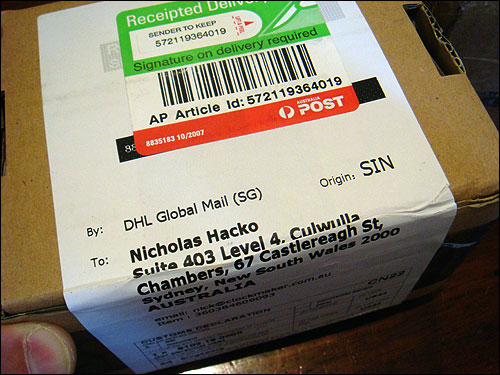
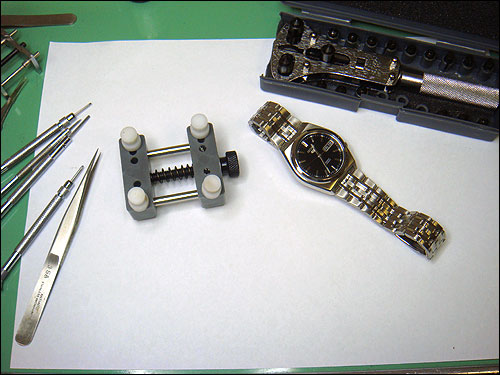
My Seiko 5 has finally arrived! On the same day I also received the basic tool kit.
The watch arrived from Singapore exactly 10 days after placing an order on eBay. It was neatly packed, in original Seiko box.
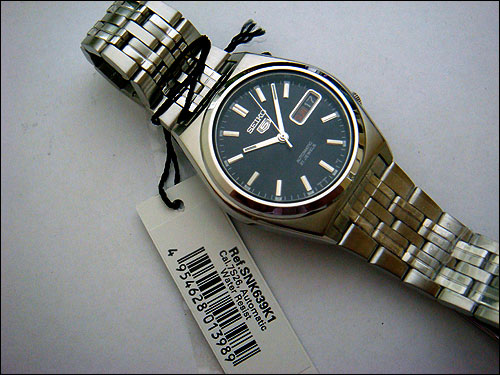
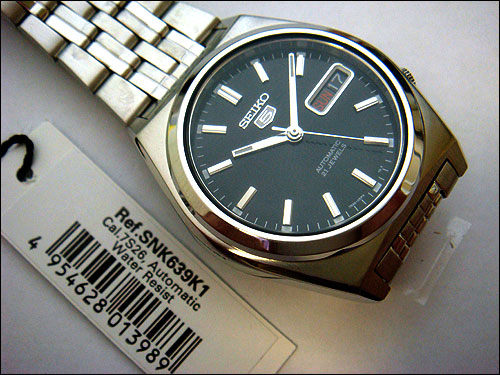
Model reference: 7S26-02E0 (also known as SNK639K1).
Let's get into it! Tools: Case holder, case opener, screwdriver (60 or 0.6mm and 100 or 1 mm), tweezers.
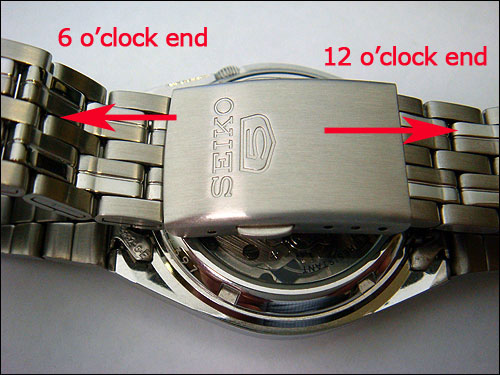
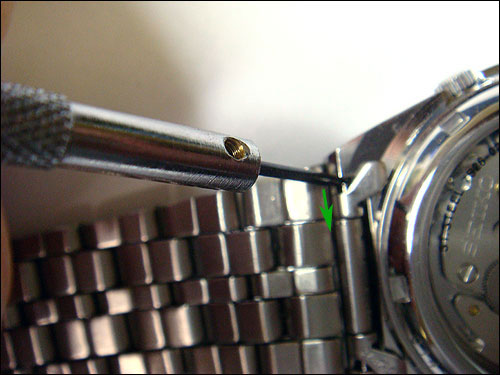
1. Bracelet removal The very first step is to detach the bracelet from the watch case. Note how the bracelet is positioned: the Seiko logo on the clasp is "facing" the 6 o'clock position.
Gently press the spring loaded bar in and pull the bracelet away. If necessary, push the bar form the other side too.
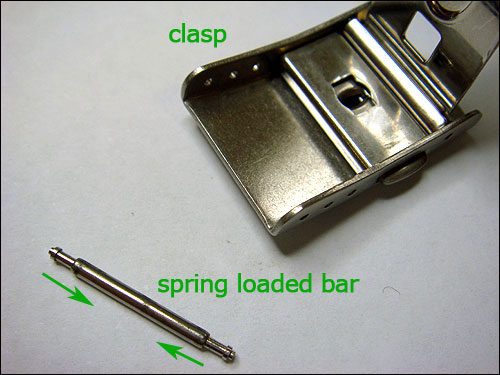
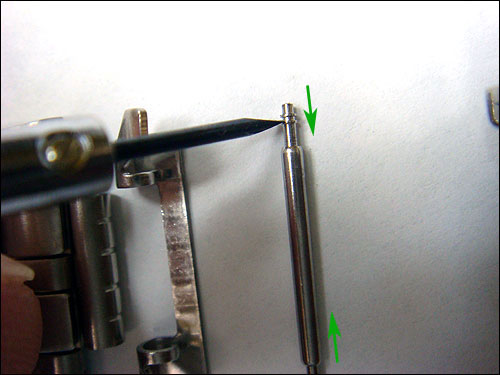
Here is another shot of the spring loaded bar (clasp)
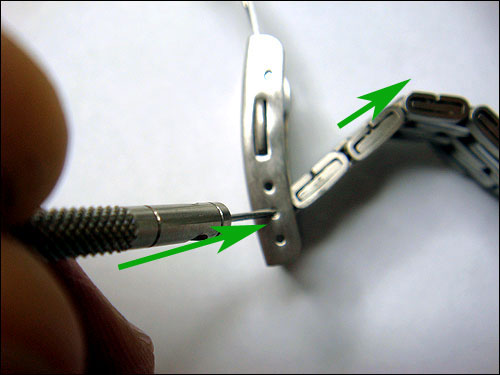
Now detach the bracelet from the watch case by sliding down the spring loaded bar (screwdriver size 100 or 1 mm blade).
Note that this bar is slightly different than a clasp bar - it has two "shoulders". Place the screwdriver between the two shoulders as per photo, slide the bar while pushing the bracelet towards yourself, away from the case. NOTE: I am left handed, so you need to rotate the watch to suit you. Here is another shot of the bar, showing the position between the shoulders where you should place the screwdriver (size 100) .
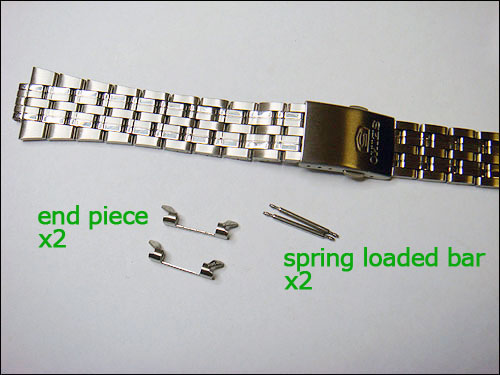
Reassemble the bracelet and store the two end pieces and bars in a plastic bag. If you are working on a pre-owned/used watch, clean the bracelet with warm soapy water. To clean the bracelet use dishwashing liquid and tooth brush. If necessary, soak overnight first. Dry well with a hair dryer.
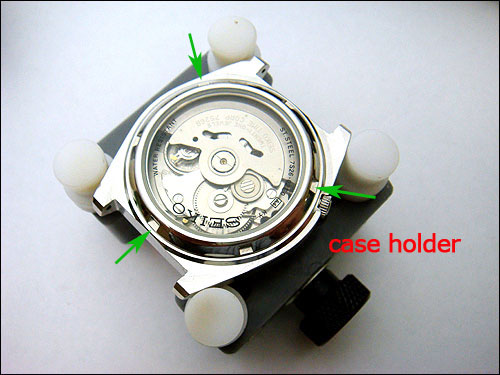
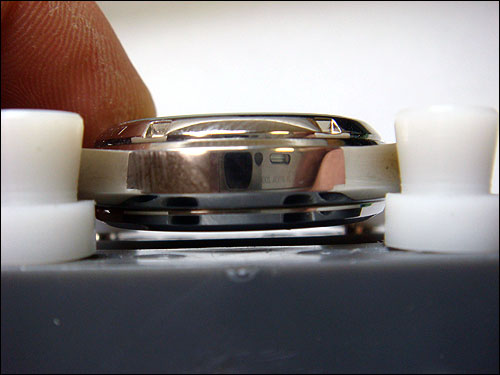
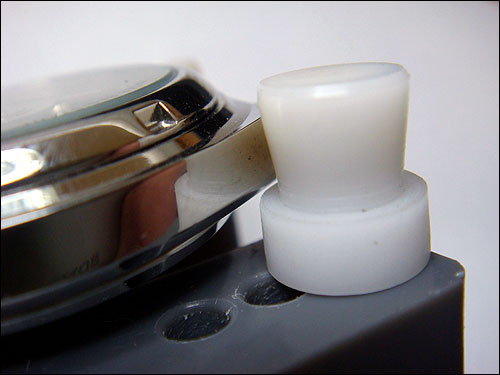
Case back removal Place the watch in the case holder as per photo. Close the holder as high as you can for a firm grip. The 3 arrows mark position on the case back where prongs of the case opener will be inserted.
However make sure that the watch sits parallel and in level, not under angle.
Here is another shot showing the point of rest / contact between the case and the tool:
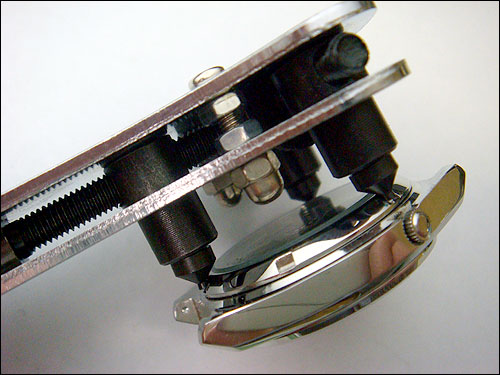
Adjust the 3 prongs of the case removal tool so that the prongs are gripping the watch case back firmly. Use a rolling screw on the top to close the first 2 prongs and then rotate handle bar to bring the third prong. Proper alignment is absolutely crucial! Take your time to adjust the tool so that both grip and alignment are correct.
Here is another shot of the case opener showing correct alignment and grip. If your case opener comes with multiple attachments, use the finest, most pointy one.
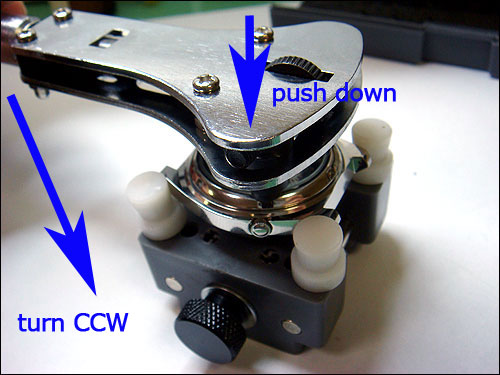
To open: put enough down pressure on the tool so it wont slip ! Turn the handle counter clock wise. Once the case back gets reasonably lose, remove the tool and unscrew it by hand. Important note: once again, it is absolutely crucial that the tool, case holder and the watch itself are properly aligned and parallel. In most cases the case back will open relatively easily. However in the case of a divers watches, it is a good idea to clamp the case holder in with a large vice. By doing so, you will have both hands free to hold and press down the case opener. Water damaged cases are almost impossible to open by hand. You may need a large bench case opener.
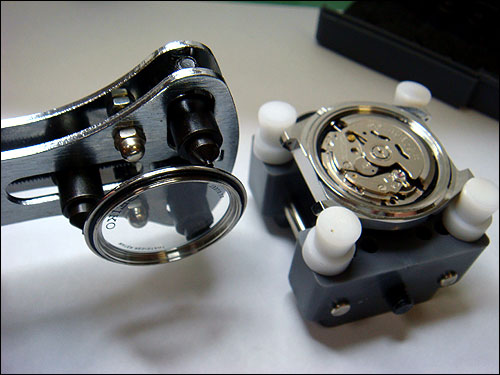
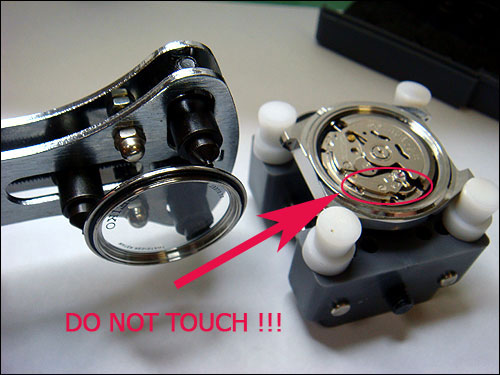
WARNING! It is ABSOLUTELY CRUCIAL that after removing the case back you DO NOT TOUCH any parts - either by hand or by a tool - which located in / around balance wheel section, especially not the balance wheel, hair spring or regulators ! ! !
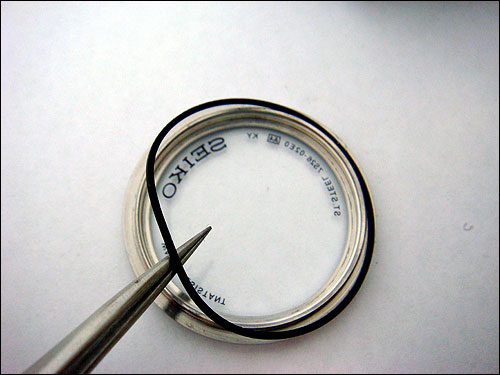
Gently and carefully remove the case back seal. DO NOT STRETCH IT! Old watches: most likely the case seal has lost it's elasticity and would require replacement. Still, try not to break it!
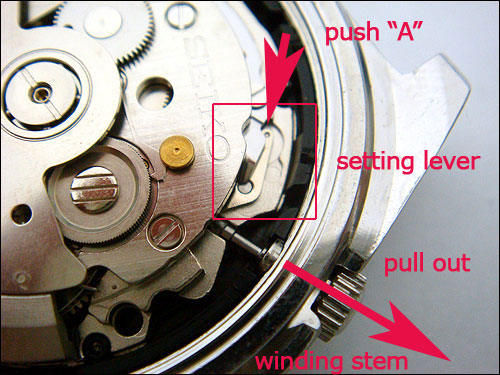
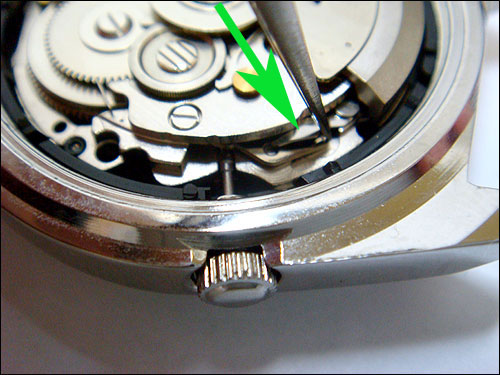
Movement (mechanism) extraction In order to extract the movement, you need to remove the winding stem. Refer to the Technical guide, page 9 section 6. Locate the setting lever (part number 0383 070, item 39)
Push the setting lever with tweezers, hold down and pull the stem out.
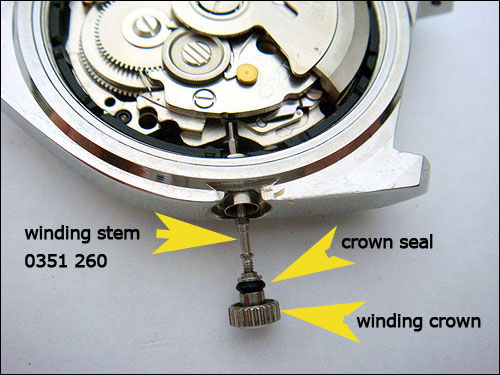
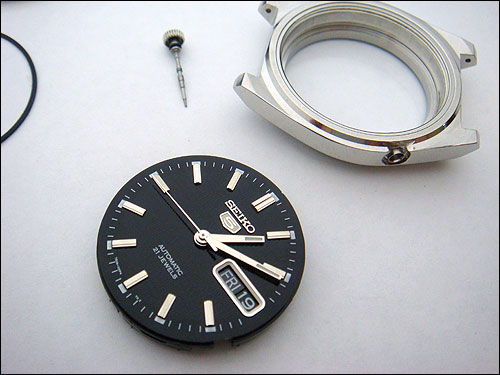
Photo showing winding stem and crown. Note: the stem is both a movement and case-related component, while the crown and seal are case-related components only.
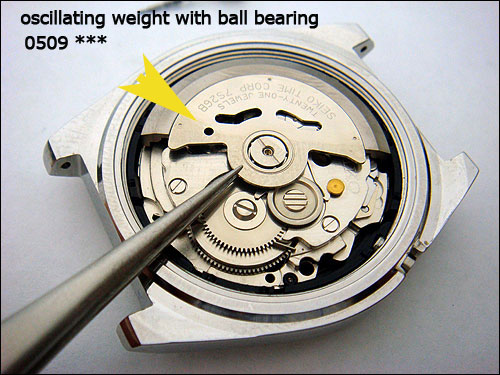
Movement extraction: using tweezers as a lever (resting against the watch case) pull the movement straight up (gently!). When extracting, hold oscillating weight (winding rotor) as close to the ball bearing as practically possible.
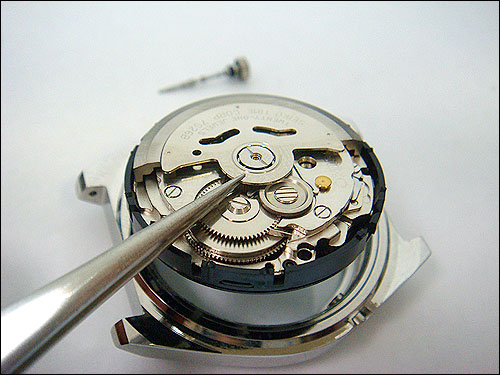
Remove and place on bench, dial and hands UP.
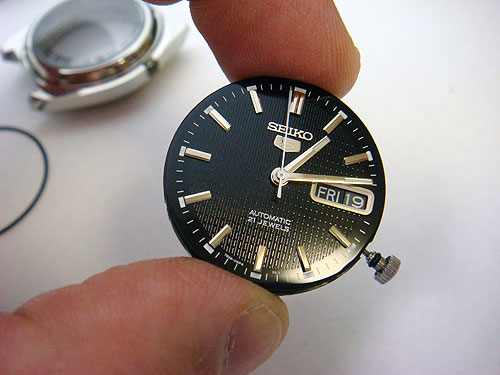
Photo showing proper way of holding the movement by hand. Do not touch the dial or hands with neither tool nor fingers! Always hold and handle as shown here.
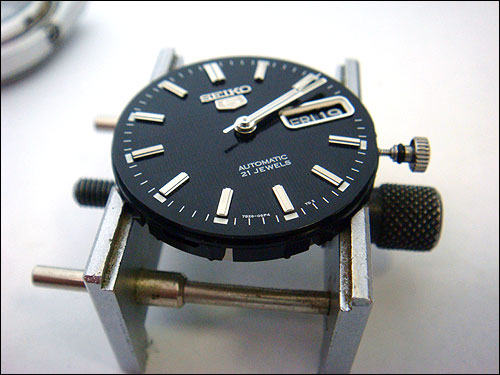
Insert the winding stem and crown into the mechanism (push in slowly and gently, turn stem slightly if required). You don't need to push down the setting lever to re-insert the stem, it will click in automatically. Place the mechanism into the movement holder as shown below.
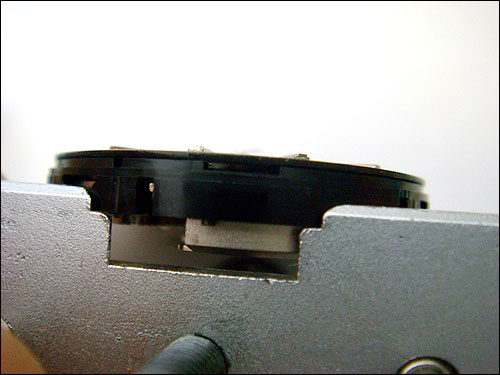
With the movement secured in the holder, pull the stem out to check if the time and calendar adjustments are operational. Troubleshooting tip: This completes the movement extraction procedure. Place all removed parts in a sealed container, ( Leave the movement remaining on the holder) and keep the lot in a dust free environment. |
|
Previous Chapter | Home | Next Chapter
|