DIY Seiko 7S26 · Chapter 12 of 14
Chapter 12
Master Watchmaker, Clockmaker and Jeweller (since 1981)
nick@clockmaker.com.au
Suite 403, Level 4, Culwulla Chambers
67 Castlereagh St. Sydney 2000 NSW Australia
Phone: (02) 9232 0500 Fax: 02 9233 2273

Do It Yourself Project: Seiko 7S26 for Novice Horologists
| Chapter 12: Exercises Part 2
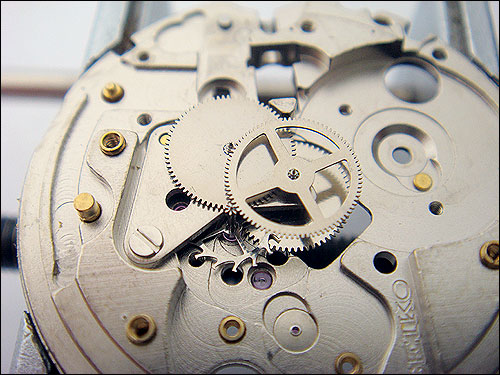
In this chapter we will continue with practical exercises. Exercise #5 The escape wheel is the last wheel in the train, but it is also part of the escapement unit. It connects the counter with the oscillator. The wheel itself is light with very fine pivots. Careful handling is essential! Due to the size of pivots and jewels it sits on, the wheel cannot be 'maneuvered' too much.
Place the wheel into the main plate as per photo.
Place the barrel and train bridge over the escape wheel. Check the wheel for radial and axial movement.
Disassemble and reassemble by repeating the above steps 20 times. Exercise time: 45 minutes. Exercise #6 In this step we will practice assembly of the third, fourth and escape wheels. Place wheels as per photo.
Place the bridge over the wheels. Align the top pivots into the bridge in the following order: - fourth wheel - third wheel - escape wheel.
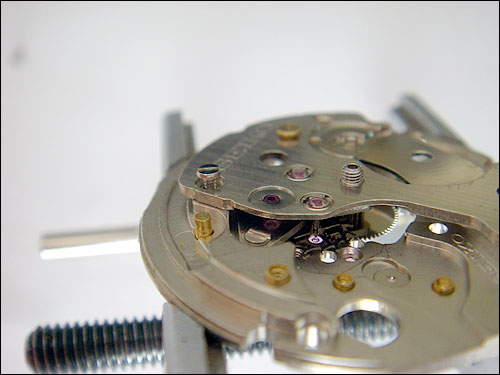
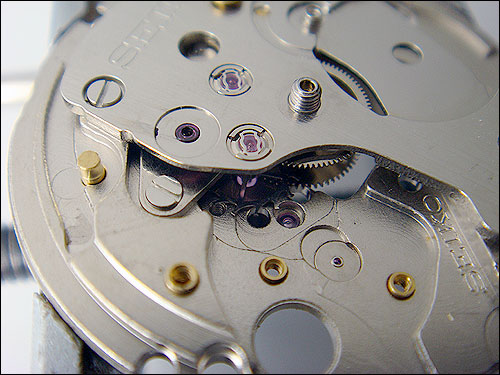
Before tightening the screws, check the train for radial movement by gently turning the centre wheel. Observe the motion - the escape wheel should turn freely with a minimal amount of force applied to the centre wheel! Disassemble and reassemble by repeating the above steps 20 times. Exercise time: 90 minutes. Exercise # 7 The pallets (or pallet) connects the escape wheel with the balance wheel. Like the escape wheel, it has very fine pivots. However it has its own bridge so assembly is less challenging. Since the bridge is held with two alignment pins, it is not necessary to insert screws until the bridge is placed and pallets checked for axial movement. Remove all wheels, including centre wheel and bridge.
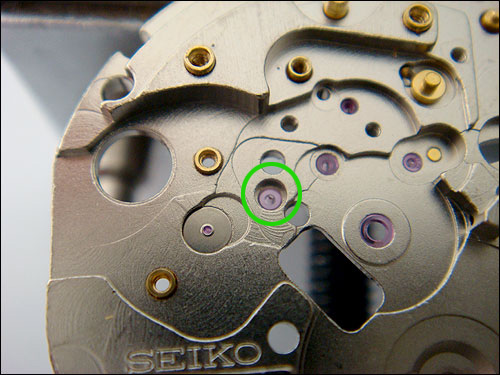
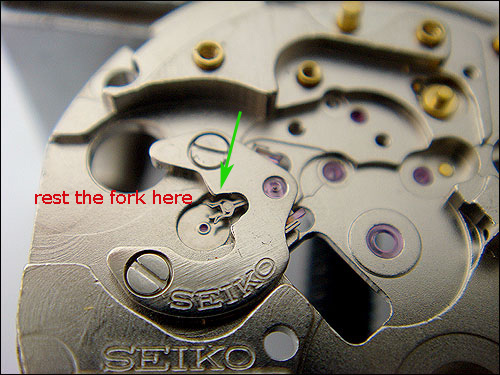
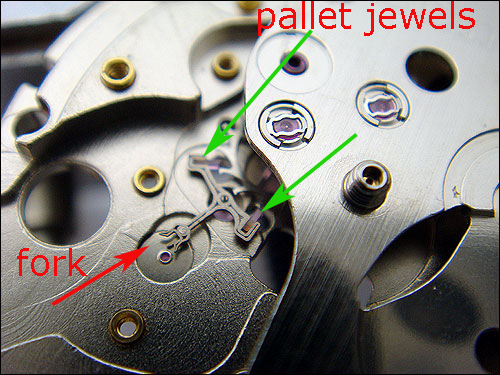
Insert the pallets into the lower jewel and position the fork as per photo.
Place the bridge over the pallets and hold it down with tweezers (gently, with minimal force), while with second tweezers steer the pallets pivot into the top jewel.
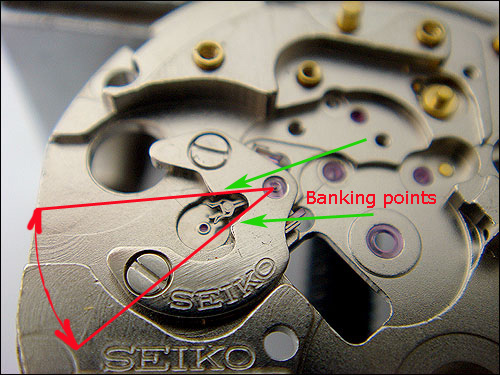
Radial movement of the pallets is limited by banking points of the bridge. Check the endshake (axial movement). When handling pallets, avoid touching pallet jewels!
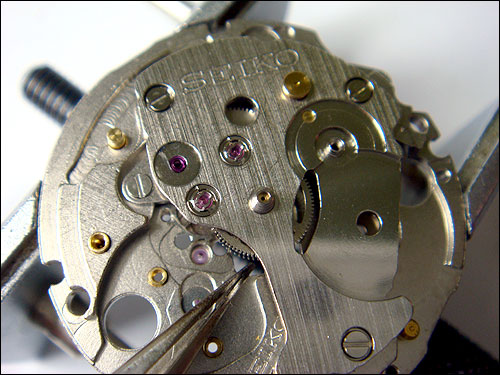
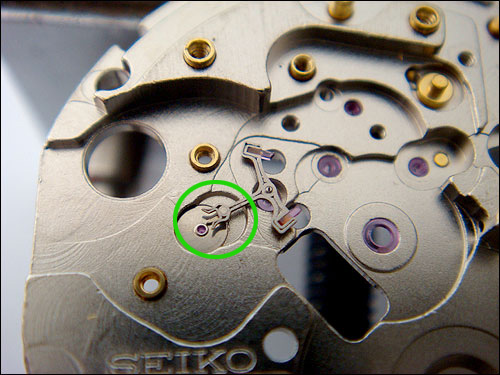
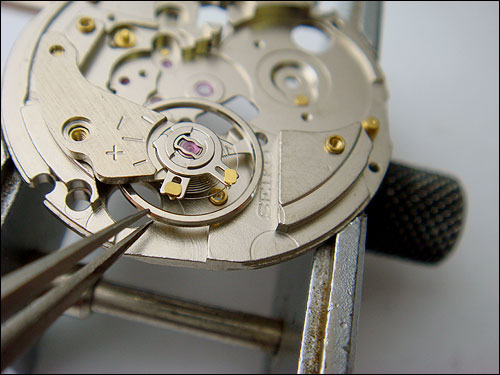
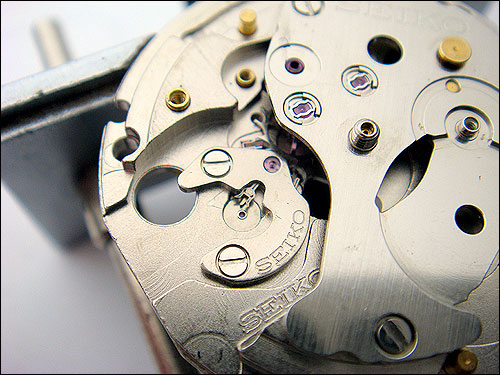
Installation of pallets is finished when pallets are set to rest at banking point as shown below.
Disassemble and reassemble by repeating the above steps 20 times. Exercise time: 45 minutes. Exercise # 8 Installation of balance wheel (complete) Before proceeding further, please refer to Chapter 9: disassembly of balance wheel. Remove all components (wheels, pallets) from the main plate.
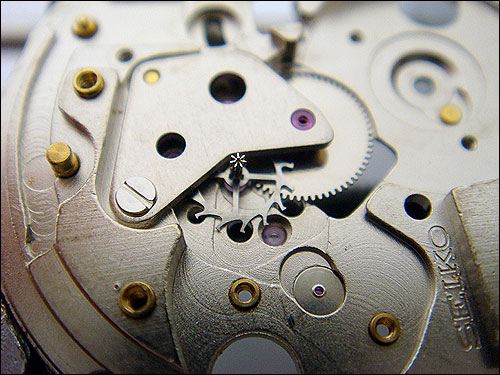
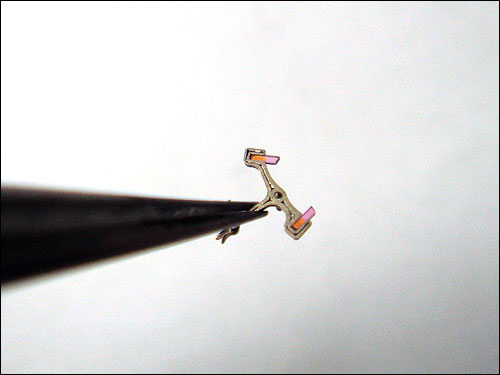
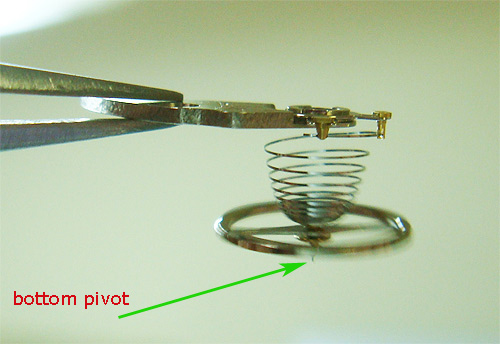
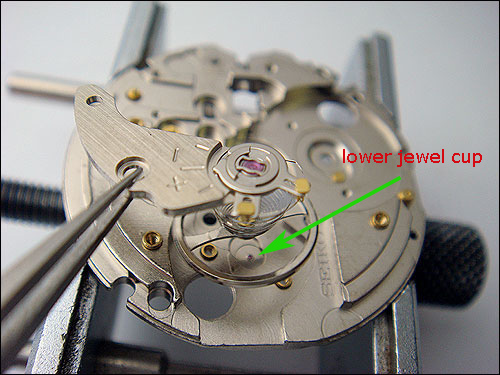
By holding the balance wheel cock as shown, insert the bottom pivot into lower jewel. Note: the lower jewel is located in a cup, which is slightly raised above the main plate. The pivot must be placed inside the cup, not 'slid in.'
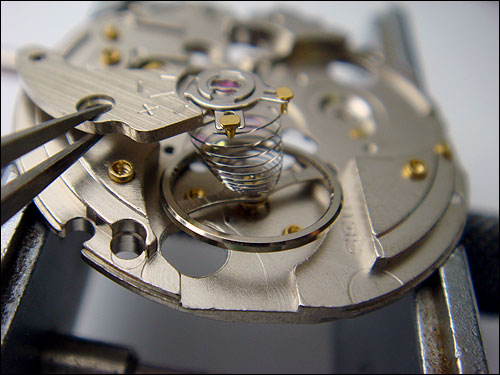
Now place the balance cock over the blance wheel. Insert the top pivot into the top jewel. Photo below shows correct method of handling / steering of the balance wheel.
Check the axial and radial movements of the wheel. You will notice that axial movement is significantly higher than on the train wheels. This is due to the fact that the balance wheel is sitting between jewels which can slightly move (shock absorbers). NOTE: do not touch the hair spring! Insert and tighten the cock screw and check the freedom of the balance wheel once again.
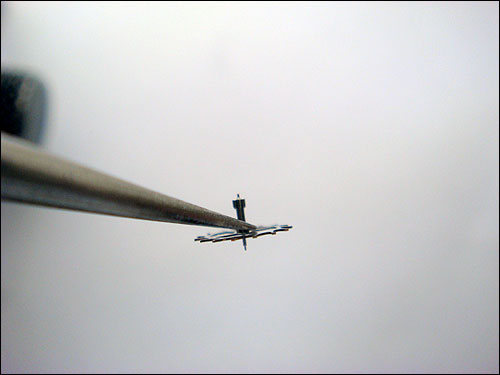
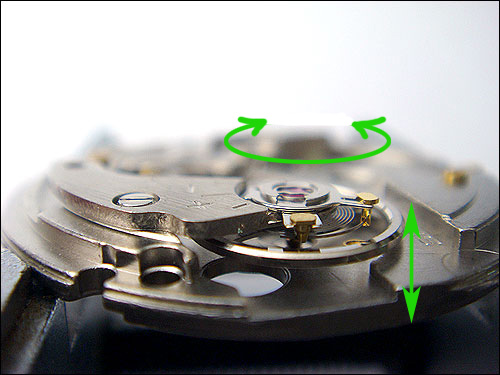
The best way to check the radial movement of the balance wheel is to gently blow air in to the balance the wheel rim (but NOT directly over hair spring!). A correctly assembled wheel will swing 300-400 degrees in either direction and it will be returned in 'centre' position by asction of hair spring. NOTE: Balance wheel MUST BE HANDLED GENTLY and with utmost caution!
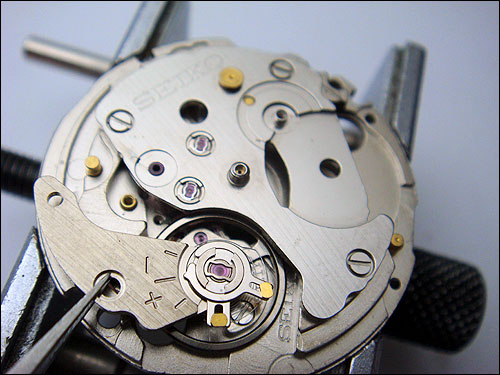
Disassemble and reassemble by repeating the above steps 20 times. Exercise time: 45 minutes. Exercise #9 Install the escape wheel and train bridge. Install pallets. Note the relation between the pallets and the escape wheel. Make sure that pallet jewels are NOT placed over the escape wheel tooth, but in between them.
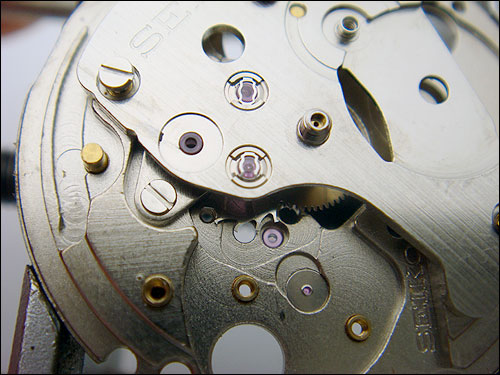
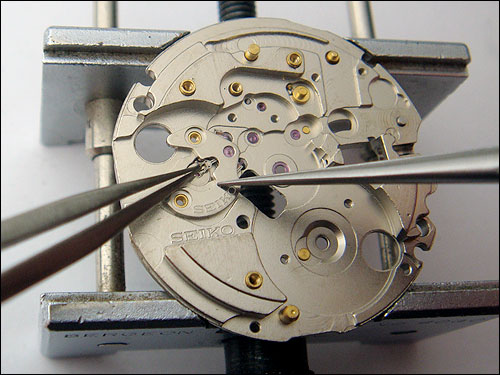
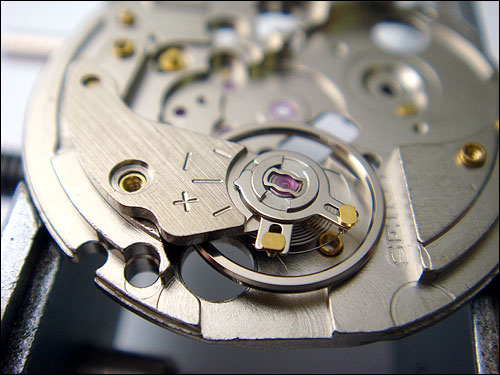
Install the pallet bridge and check the 'freedom' of the pallets. Position pallets to rest on banking side as per photo.
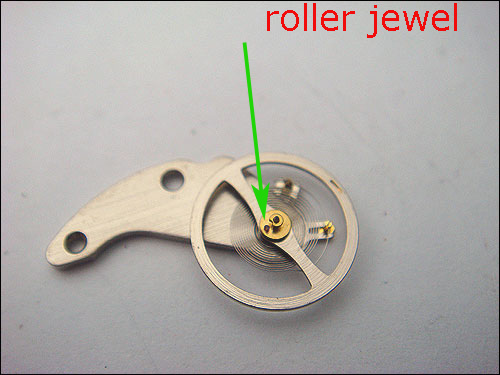
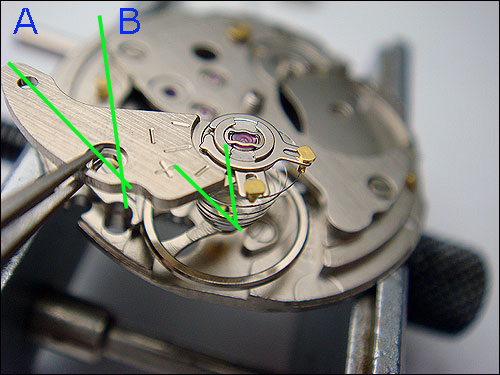
Install the balance wheel. IMPORTANT! Before proceeding further, it is absolutely crucial to understand how the escape wheel is 'connected' to the pallets. The point of connection is via the roller jewel.
The roller jewel sits inside the pallet fork.
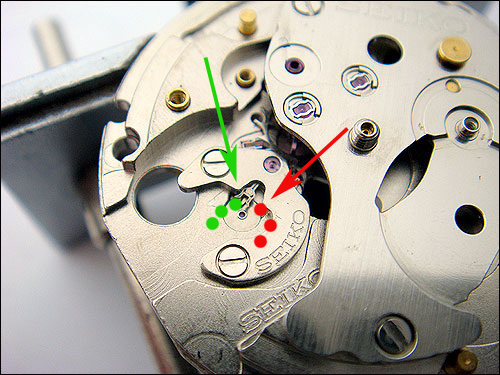
Correct installation procedure is to
- then to insert the balance wheel so that the pin enters the trajectory as dotted in green. If the pallets are banked on the oposite side, the roller pin cannot enter the fork and the balance wheel will be only "free" to rotate on one side, while hitting the fork from the 'outside' which will result in a sudden stop. The installation procedure may be challenging to a novice watch enthusiast, however if the balance wheel is not installed properly it is necessary to repeat the placement process until the jewel is placed in the fork AND the balance wheel is stiting correctly between the jewel cups. Red dots mark the incorrect point of placement of the roller jewel. Once again, this is the most delicate assembly step and it must not be rushed! Take your time! Practically, the installation 'trick' is to
- bringing the wheel into the lower cup jewel, then - aligning the cock over the alignmnt pins (line B). By doing so, the roller jewel will 'find its way' into the fork 'by itself'.
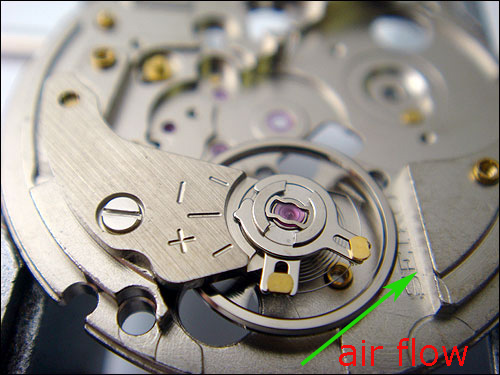
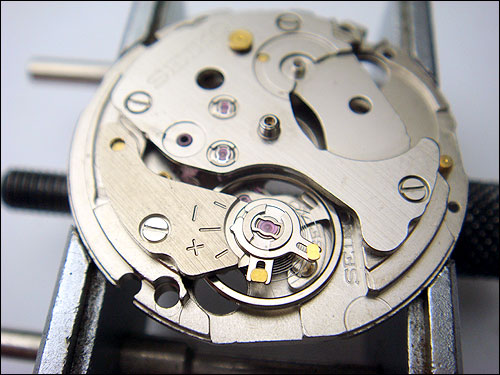
You have now assembled all 3 components of the oscillator unit: the escape wheel, pallets and balance complete. By gently blowing air (use a hand pump!) get the balance wheel to oscillate. Observe the action of pallets in relation to the balance wheel and escape wheel. (The escape wheel should not rotate).
Repeat the above step 10 times. No time frame is set for this excercise. |
|
Previous Chapter | Home | Next Chapter
|